Sunday, April 30, 2023

Desert Details for Monday Montage


One of the most gorgeous bundles that is about to retire is Desert Details. In fact the entire Delicate Desert Suite Collection is over the top wonderful. I have two projects to share for our Monday Montage Blog Hop. The first is a large envelope style bag that is perfect for wrapping a small gift. It's made from a sheet of 12" x 12" Delicate Desert DSP.


This second project is another gift wrap idea made with an 8" x 8" piece of Delicate Desert DSP. It's and easy fold up that is held shut with a decorative belly band.


Coming up next in our hop is Emily or if you are working back you will arrive at Cheryl's blog.


Legendary Ride Technique Time! Stamp Class Registration

Don't miss out on my monthly Technique Time! stamp class. This month's class will be a "double take" of the Legendary Ride Bundle. What's a "double take"? Each card in the class will be designed for men/him and then will be redesigned for women/her.


There are two options to choose from: a full kit shipped to you OR online access. Register while supplies last as class kits will be limited.

This online class will be recorded for replay. 

We'll be creating four artfully avid style cards, two for him and two for her. These will include striking focal points, fancy folds, patterned papers, and finishing touches of ribbon/twine and dot embellishments. 

Class kits will include precut and scored cardstock card bases, NON Legendary Ride die cuts, a sampling of: Fresh as a Daisy DSP; 2023-25 In Color Dots; Silver Foil; pieces of assorted SU! ribbon/twine; precut cardstock pieces to complete all the stamping and die cutting of Legendary Ride Dies. 

Registration open from 4/30 to 5/12 or until kits are sold out.

Use the button below to reserve your spot.

Option 1 - Full Kit $31
  • Fully loaded class kit packet
  • Access to the FB Live class/replay on 5/18
  • Invitation to the 5/19 Zoom gathering/class
  • Membership to SeeingINKspots Backstage Pass
    • video recordings of this class & many more past classes
    • full array of photos for this class & many more past classes
  • First class shipping, kits ship 5/13
Option 2 - Online Access $16
  • A PDF of the cutting measurements for the three projects
  • Access to the FB Live class/replay on 5/18
  • Invitation to the 5/19 Zoom gathering/class
  • Six-month membership to SeeingINKspots Backstage Pass
    • video recording of this class & many more past classes
    • full array of photos for this class & many more past classes
Choose your option
Options

Wednesday, April 26, 2023

Artisan Post #6: A Tuesday Tip


Step 1. Punch 18-22 hearts using the Country Bouquet Punch and curl each one with a Bone Folder.


Step 2. Die cut a 2 1/2” circle. Starting on the outer edge adhere curled hearts to the circle. Once the adhesive is dry gently press the curled hearts away from the center of the circle.  


Step 3. Continue to add more curled hearts until the circle is filled. Use Paper Snips to trim the heart tips around the circle. 


Step 4. For the leaves punch 2-3 more hearts in a contrasting paper. Softly curl each with a bone folder and attach as desired.


Friday, April 21, 2023

#TGIF417 Partial Die Cutting


Have you ever tried partial die cutting? It's a cool technique and is our latest challenge at #TGIF417. For my card I used the Lighting the Way Bundle and one of the squares from Stylish Shapes.


Here's how to partially die cut:
  1. Stamp an image that has a coordinating die.
  2. Position the die around the image and place cutting plate on only a portion of the image. Run through a die cutting machine.
  3. Position a second die under the partially die cut piece and run through a die cutting machine.


Thursday, April 20, 2023

Artisan Post #5: Lighting the Way


For this post I will be sharing my 5th Artisan Post for the year. I made these cards which are reminiscent of warm summer evenings and lightning bugs “floating on a breeze.” These rich and lush cards are filled with several simple, yet effective, inking and stamping techniques.


Give the lantern an aged look by pressing the die directly into a Smoky Slate Ink Pad cut side down. Carefully remove the die from the ink pad and place it inked side down on a piece of Basic White Cardstock. Run through the Stampin’ Cut Emboss Machine as usual. Next, watercolor the lantern with an Old Olive Ink Pad and a Water Painter.


To create a shimmering/illuminated appearance for the light inside the lantern, ink up one of the circle images from Lighting the Way with Fresh Freesia Ink and stamp it over and over being sure to slightly reposition and rotate the stamp each time. Repeat the stamping until desired effect is achieved. Use Wink of Stella Clear Glitter Brush to add an extra sparkly glowing look.


To create multicolored flowers ink up your floral image from the Petal Park Stamp Set with Petal Pink Ink, then use a Small Blending Brush to dab on Fresh Freesia Ink. Pounce the color here and there. Give a huff/breath on the image then stamp on Basic White. This is the simplest inking technique and works with all stamps and inks. Just be sure to ink up with your lighter color first.


Tuesday, April 18, 2023

Holy Guacamole!


How about avocados for a "character" challenge with Stampin' Fancy Friday? 


I am totally loving the Taco Fiesta Stamp Set. Pair it with bright colored papers and inks and you can create a party on a card!


Another great product to use with Taco Fiesta is the Desert Details Dies. The labels and motifs in the set of dies add just the right amount of southwestern flair. I also enjoy coloring the stamped images with Stampin' Blends. For this card I stamped everything in Shaded Spruce and then colored with Poppy Parade, So Saffron, Crumb Cake, Gray Granite, Granny Apple Green, and Shaded Spruce.


This is a top gate fold style card so I was careful to choose a pattern paper that would look great both front and back. As you see in the photo below the reverse side of the paper is seen on the inside of the card. Of course I made it a pocket and then added a bit more decor to really finish this card up in style.


Color Challenge Time


It's color challenge time at Hand Stamped Sentiments. We are mixing two close colors, Pool Party and Mint Macaron, with a deep and dark hue, Blackberry Bliss. I added a few similar purple tones to bridge the gap between the two lighter tones. I include a touch of Bubble Bath and Berry Burst.


I have used some new stamps and dies. They are called Gorgeously Made. The images are great for creating visually textured backgrounds and the dies are pretty cool. There are a couple borders and a couple different leaf stems. The last piece in the set of dies is a banner with torn ends. It reminds me of a piece of tape.


Sunday, April 16, 2023

Sentimental Park Bi-Fold Card


It's that time again for another Monday Montage Blog Hop. Since we are all stampin' fans and "dear friends" I thought I would share a bi-fold card featuring the Sentimental Park Bundle and the Regency Park Suite Collection.


I took my color palette cues right from the Regency Park 6" x 6" DSP. It's a bit unexpected combination of colors. I would put Night of Navy and Petal Pink together, but would not have thought to use Shaded Spruce. It's a refreshing change that adds a bit more spark than say Pear Pizzazz or Old Olive.


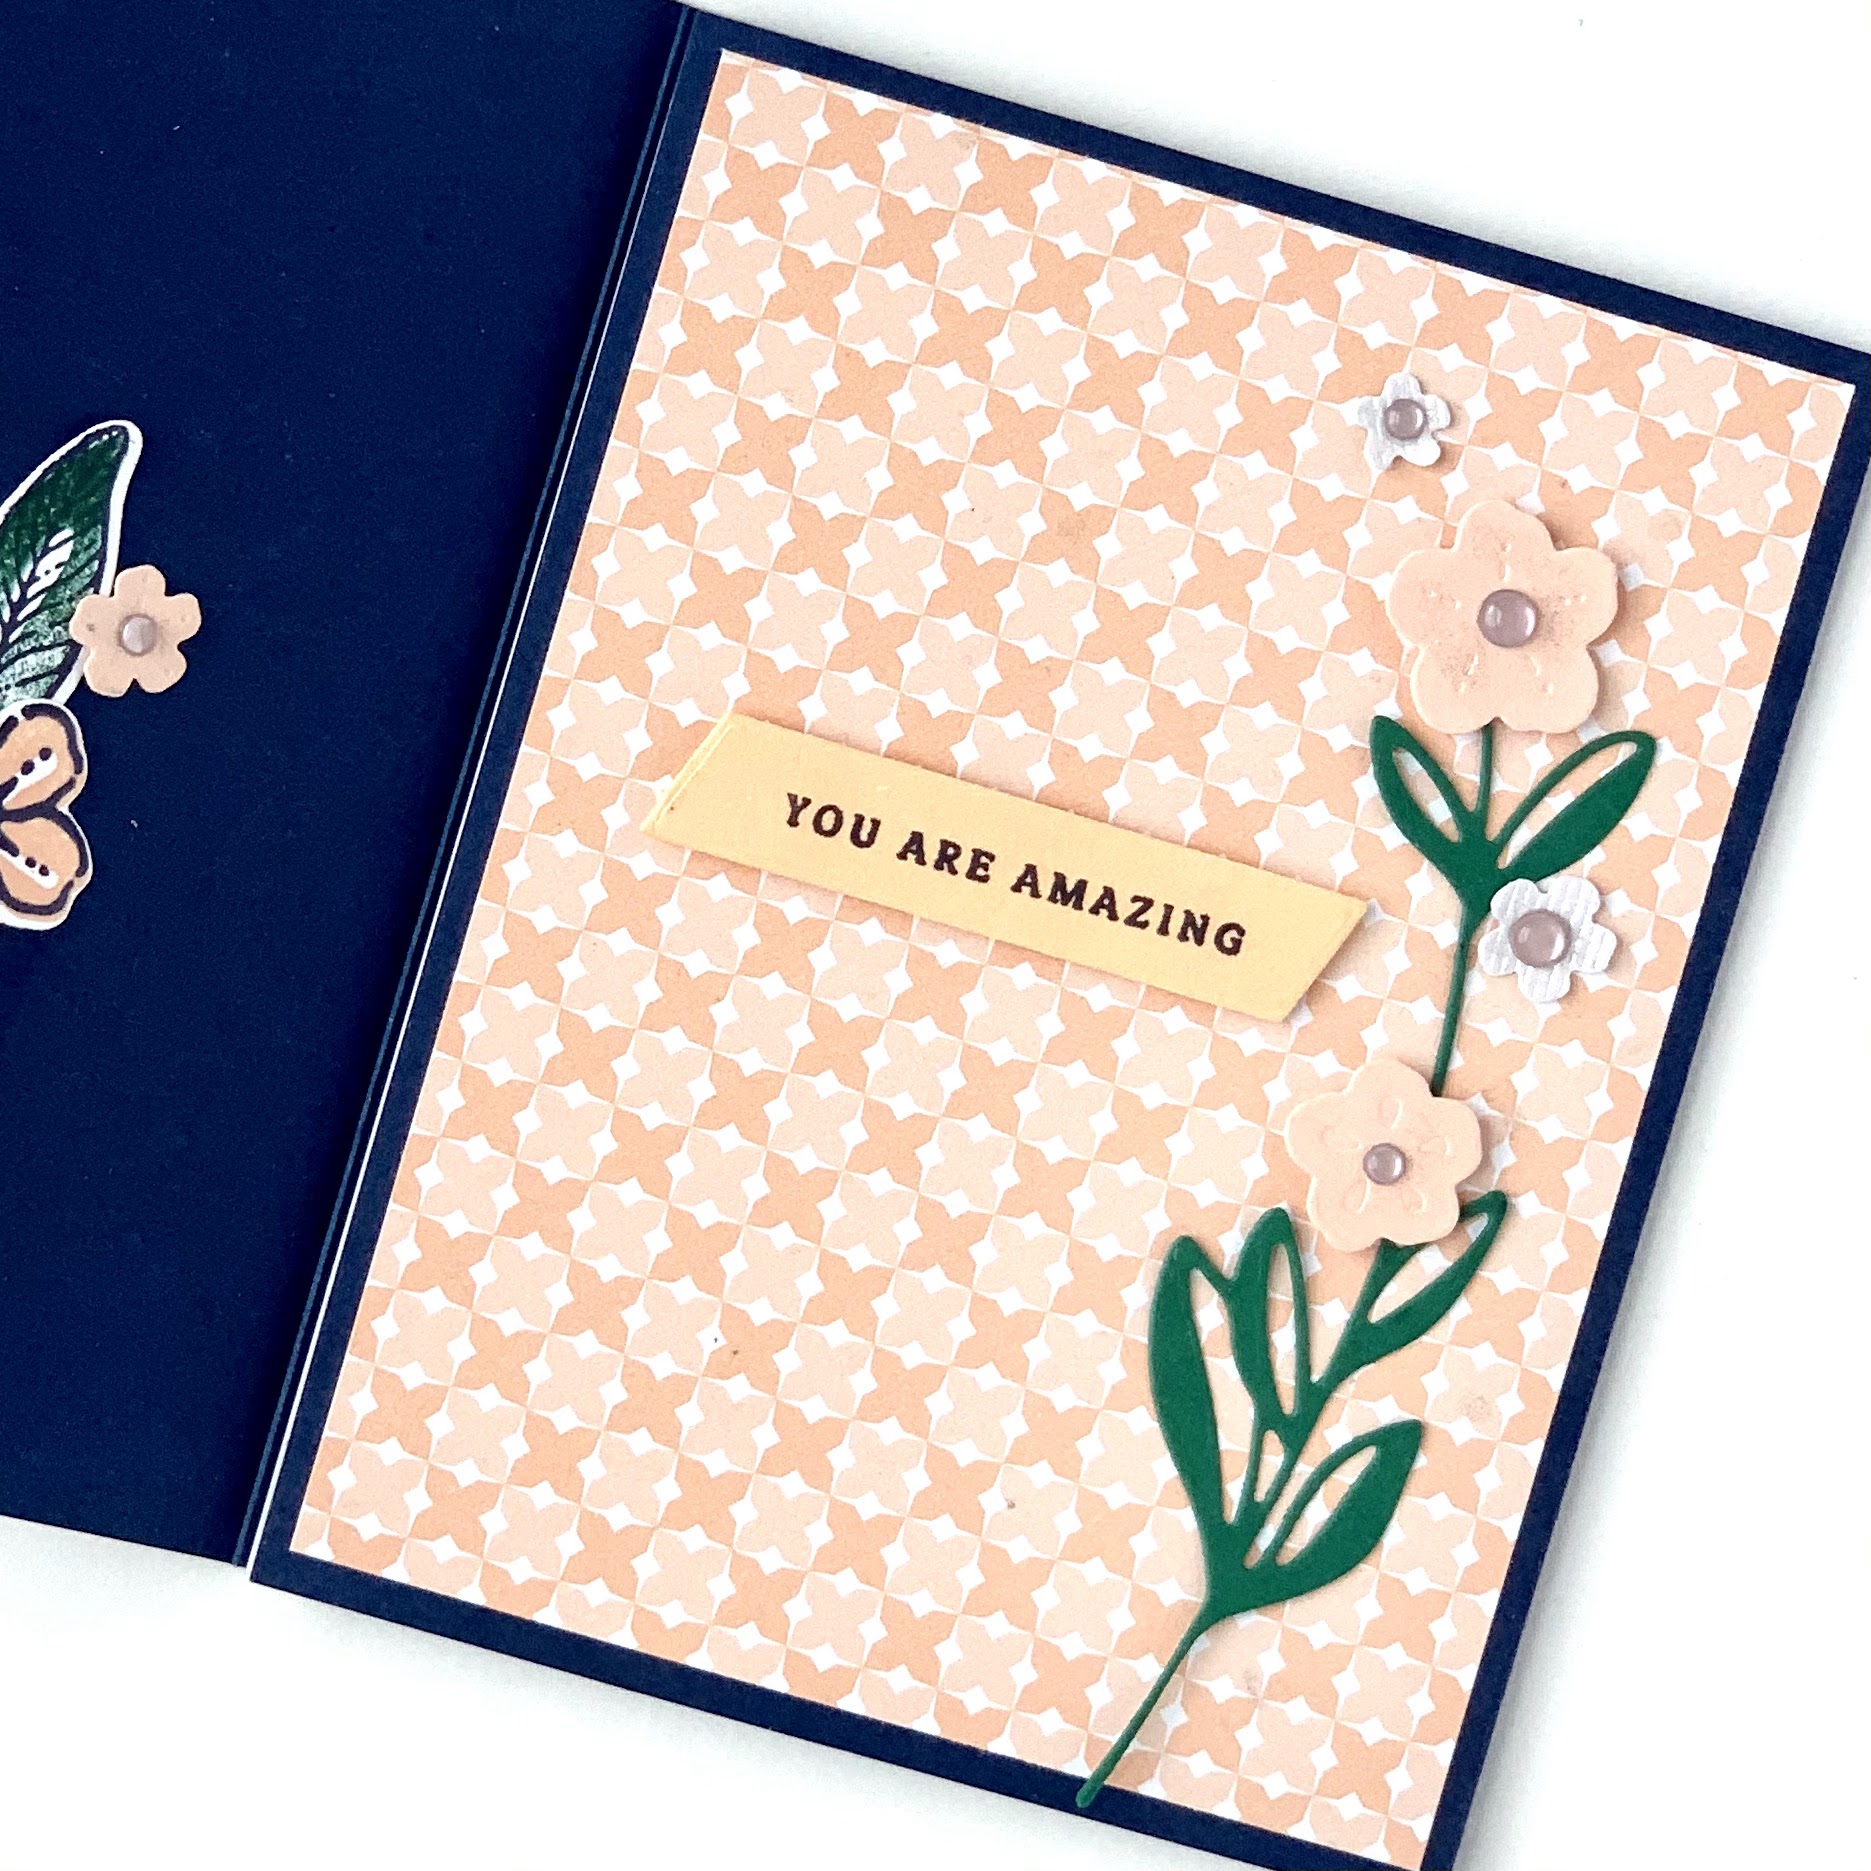
When you open the card you see what I call a second card front.


Here's a look at the inside of the card front. I glued the DSP to create a pocket. Now here's the bummer. I forgot to take a photo of the inside of the card. When you open the "you're amazing inside panel there is a Basic White with more stampin'. If I get my act together I get a pic taken and added to this post.


Thanks for stopping in for our Monday Montage Blog Hop. Next in the hop is Emily or if you prefer working back you can visit with Dani.