Thursday, June 30, 2022

A Paper Pumpkin Thing: Pick of the Crop


Welcome to another A Paper Pumpkin Thing Blog Hop.  This month's Kit is called Pick of the Crop and it's packed full of charming elements to create stacks of awesomeness.


So far I've made two alternative cards with this kit.  One filled with lots of stampin' and the other with lots of fussy cutting.  My strawberry "hello" card includes an assist from the Cup of Tea Bundle.  

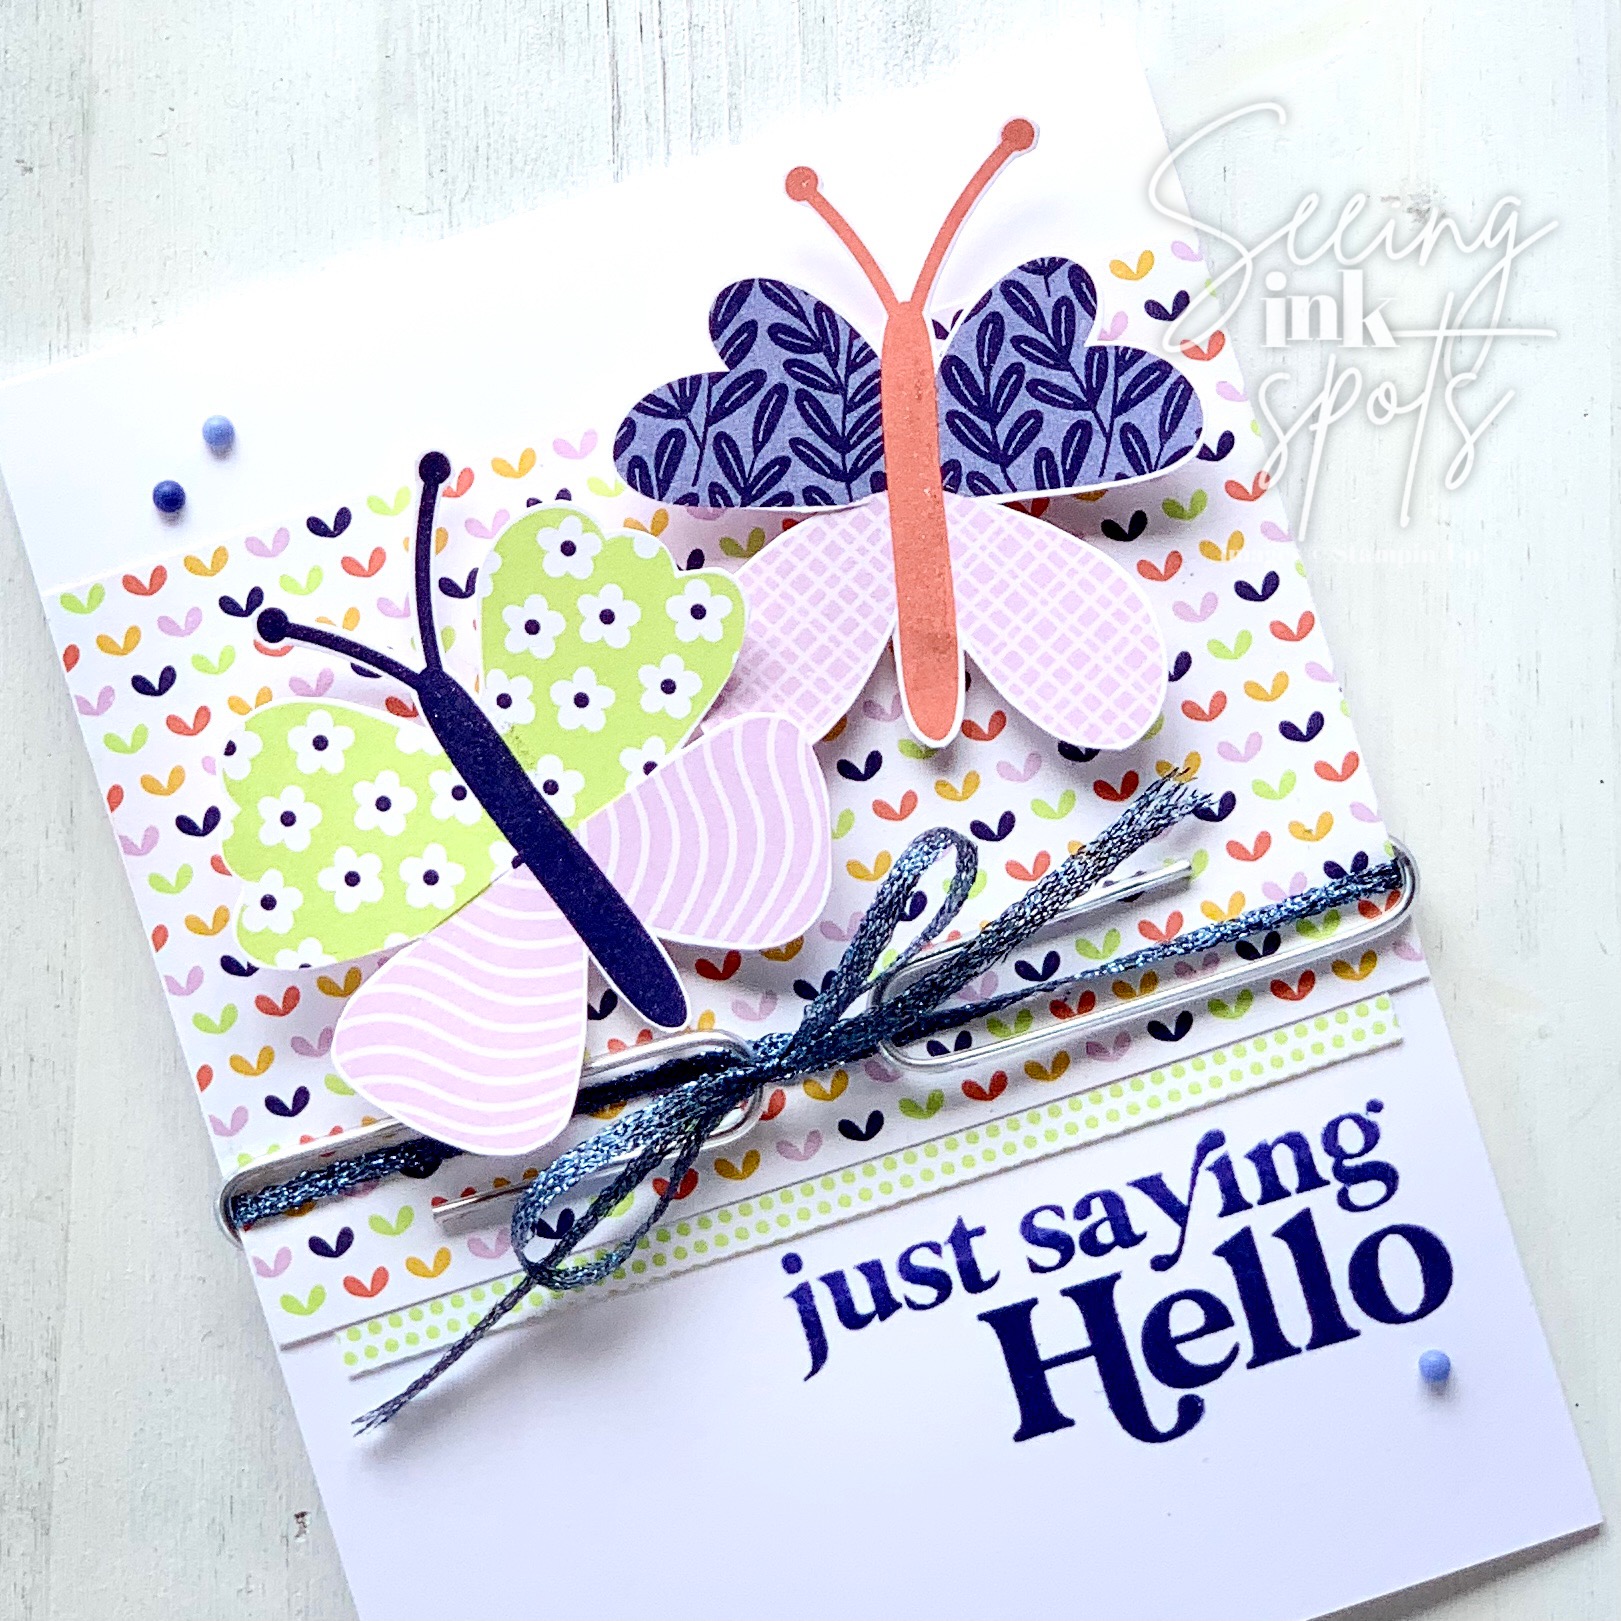
I started with a Basic White panel which I mounted on a Sahara Sand top fold card base.  On the white I sponged a light coverage of Calypso Coral ink and then stamped several strawberries.  The die cut circle was cut from one of the printed envelopes from the kit to which I added a fussy cut greeting.  I stamped the greeting and a few flowers with Sweet Sorbet.  I also added some Petal Pink flowers as well.  I love how the Calypso Coral, Sweet Sorbet, and Petal Pink combine to create a monochromatic palette. 


Okay so you're looking at my second card and you're thinking it's not an alternative.  It is though!  I deconstructed the fruit basket card base and reassembled it with Stampin' Dimensionals to go from flat to puffy.


Here's a closer look at the dimension.  Besides fussy cutting the front of the card I also cut apart the single strawberry and blueberry printed die cut.  This gave me one more piece of fruit for each basket to give them a bit more fullness.  I reconstructed all the pieces of this card on a top fold Sahara Sand base.


Join me next Thursday, July 7 at 10:00 a.m. mountain time, for a Facebook Live Class.  Bring your Pick of the Crop Paper Pumpkin Kit and together we will Up!STYLE a stack of projects.


Keep moving through our Pick of the Crop A Paper Pumpkin Thing Blog Hop and you'll be loving all the inspiration.  Enjoy and happy stampin'.


Tuesday, June 28, 2022

Cup Of Tea Sketch


You want to know what's fun?  Mixing older printed papers and cardstock with new stamp sets and dies. For this Hand Stamped Sentiments sketch challenge I created with the Cup of Tea Bundle and some older Stampin' Up! DSP that I don't recall the name.  


My interpretation of this sketch challenge is slightly varied from the original layout. I replaced the sentiment panel with the two stacked tea cups. I shifted the light gray layer of the sketch to the right and then I added my greeting to the left circle.  


The cardstock color for my card base is Crisp Cantaloupe, a retired In Color.  I've combined that color with Sweet Sorbet and Parakeet Party inks.  What's cool is that all the flowers, tea cups, and greeting were stamped with one ink pad -- Sweet Sorbet.  It's a color that has a huge range when stamped first, second, ad even third generations.


There is an opportunity for you to earn a FREE #useitup! class kit for July.  When you purchase $75 before tax and shipping and use June's host code you will get a class kit sent to you.  Also, here is the really awesome part of this deal, you can be a part of my Seeinginkspots Backstage Pass, my private Facebook Group where my classes are posted.  June's host code is DHBQ43RW.


Sunday, June 19, 2022

Rugged Icons Goes His and Hers


Welcome to our Monday Montage Blog Hop.  A few weeks back I shared the "his" version of a card made with the Rugged Icons Dies.  Now, I thought I would share my spin on this layout for "her" which I believe is SOOOOOOO awesome I had to share it with you all.


For the "her" version of this card I worked with a Fresh Freesia, Calypso Coral, and Crushed Curry color palette and I swapped out the beard and mustache die for the guitar. 


This set of dies is super perfect for the inlay technique.  Simply cut three of the same icons then mix and match the pieces.  Combine solid cardstock with DSP for a fabulous look.  The adorable pattern paper for this card is from the Butterfly Kisses DSP.  


I am happy you visited with us for our hop.  Next you will be heading over to Julie's Creating on the Run Blog.  Or, if you work backwards you'll be headed to Dani's Thoughtful Corner.

to Julie


to Dani


Friday, June 17, 2022

#TGIF373 Paper Clips


#TGIF373 is pulling out paper clips from our desks and incorporating them into a hand stamped project for this week's challenge.  I grabbed two extra large paper clips to add to my clean and simple card featuring the Butterfly Kisses DSP.


I fussy cut two butterflies from the Butterfly Kisses DSP for my focal images and then layered them on two more prints from the same pack.  Once I had those adhered to my card I slipped on the paper clips and then ran Starry Sky Metallic Ribbon through them and tied a bow. 


What I love to do when stamping a greeting is to use two colors of inks.  I first ink the entire image in the lighter of the two colors then I ink the bottom of the stamp with the darker color.  I love the two-tone finish.  Speaking of finish to wrap this card up I included three of the 2022-2024 In Color Matte Decorative Dots.


Tuesday, June 14, 2022

Holy Smokes it's Hand Stamped Sentiments


Holy smokes you're flippin' awesome!  That's right I believe that anyone/any stamper who stops by my blog is "flippin' awesome!"  Speaking of awesome I must share my opinion of the He's The Man Suite in the Stampin' Up! Annual Catalog.  I give it an A+++++!  The variety in the DSP and the laser cut elements included in each pack are fan-freaking-tastic.


This Suite was my first thought when I saw our inspiration challenge board at Hand Stamped Sentiments.


This clever cut card is what I call a kickstand card. To make one you simply:
  • cut twice on your card front from the edge to the fold
  • adhere a panel of DSP to the card front under the "kickstand" section
  • adhere a smaller contrasting panel of DSP to kickstand
  • add decor as desired to entire card front
  • add decor as desired to the inside of the card


Here is the inside of my card.  What you see is the backside of the butcher paper design which is the Cajun Craze stripe and the two narrow strips of black DSP are the backsides of the piece layered behind the kickstand.


Are you wanting to create awesome hand made stamp projects? I'm happy to help you find just what need. Shop with me and earn free class kits. Use my current host code DBHQ43RW for June and spend $75 before tax and shipping you'll be sent June's Technique Time! Stamp Class Kit for FREE. This class for June will feature the Tea Cup Bundle.


Friday, June 10, 2022

Respect the Beard for Day 5 of 7 Days of Scrapbooking


For day five of #sevendaysofscrapbooking I chose to share this 12" x 12" layout.  I took this picture of Santa back in December of 2019.  I just happened to catch him holding my dog Livy.


I pulled out several die sets to put this page together.  Some sets I dug out from my stash that I have had for quite sometime and some that are brand new.


I used the Large Letter Alphabet Dies for the word "respect."  I cut it from Poppy Parade and then painted each with Poppy Parade Ink and Wink of Stella.  For the word "the" I used the Word Wishes Dies.  I cut the word "father" and then used Paper Snips to cut off the f, a, and r.


For the beard I used the Rugged Icon Dies.  I accented it with the Merriest Moments Stamp Set and matching dies.  And, then layered those elements on a Fabulous Frames die cut.  I busted out a recently retired die set called Playful Alphabet for the black glimmer "beard."  To stamp the date I inked up the Alphabet Rotary Stamp which is also retired, but always within reach--it's a keeper.


I would love to help you create awesome hand made stamp projects. Shop with me and earn free class kits. Use my current host code DBHQ43RW for June and spend $75 before tax and shipping you'll be sent June's Technique Time! Stamp Class Kit for FREE. This class for June will feature the Tea Cup Bundle.


Sunday, June 5, 2022

For Monday Montage I'm Celebrating In Color


Are you a Paper Pumpkin subscriber?  This past kit was jam packed with so many fantastic elements.  I love how the designed the cards and the touches of gold were super fancy.


I altered them just a little bit.  I included the new corresponding In Color Ink Pads, Cardstock, and Baker's Twine.  I also used the Summer Shadows Dies to add a bit of floral and foliage decor.


Coming up next is Emily or going back is Dani.  Have a fabulous day and I hope you get to go get some ink on your fingers and do a little rubber stampin'.


I would love to help you create awesome hand made stamp projects. Shop with me and earn free class kits. Use my current host code DBHQ43RW for June and spend $75 before tax and shipping you'll be sent June's Technique Time! Stamp Class Kit for FREE. This class for June will feature the Tea Cup Bundle.


Creation Station is Inspired by Water


Happy day to all who are visiting with us for our June Creation Station Blog Hop.  This hop is all about being inspired by water.  Each of us will interpret that theme however we choose.  I chose to feature the Let's Set Sail Stamp Set and Punch along with using a Water Painter to create cool effects.


You can see that this fancy folded style card includes lots of layers and and details.  One the card front I used both the Stripes and Splatters Embossing Folders from the combo pack.  Take a close look at the embossed stripes and you'll see I preinked the folder before running it through the Stampin' Cut and Emboss Machine.  Then I painted the inked stripes with a Water Painter to blend and move the ink to make it more watery in appearance.  To go with the splatter folder I splattered Wink of Stella for a bit of sparkle and additional subtle texture.


The inside of the card is jam packed with more stampin' goodness.  The center Basic White panel is stamped with the large background image from the Let's Set Sail Stamp Set from top to bottom.  I used Balmy Blue on the top third and Coastal Cabana on the bottom.  Next, I used a Water Painter filled with plain water to paint the entire piece.  This gave a realistic water look.


Once the piece was dry I stamped the boat shadow casting in the water and then glued the sailboats in place.  Last, I stamped the greeting in Bermuda Bay and the birds in Misty Moonlight.


Behind the folded back left side I glued the front panel carefully so I could create a tucked away gift card pocket.  If you know me you know I will add a pocket to just about any card.  I say if every pair of pants can have two, four, and even more pockets why can't cards have them.


Sharing our water inspired projects has been fun for us.  We all hope you are lovin' this hop.  Next along the hop is the INCREDIBLE Mikaela Titheridge at the Crafty Oink Pen.  Click over and be amazed.


I would love to help you create awesome hand made stamp projects. Shop with me and earn free class kits. Use my current host code DBHQ43RW for June and spend $75 before tax and shipping you'll be sent June's Technique Time! Stamp Class Kit for FREE. This class for June will feature the Tea Cup Bundle.